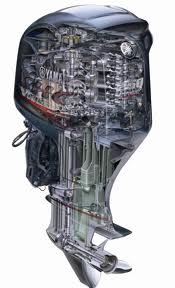
How to Winterize Yamaha 4-stroke Outboards
 It’s that time of the year again. Jack Frost is slowly creeping in and creating havoc all over the United States. Hopefully, you have already begun to winterize all your vehicles. Today, we are focusing on the right way to winterize your Yamaha Outboards, specifically the 4-stroke.
It’s not nearly as hard as you’d think, and, if done properly, it ensures that your motor will be ready for the next boating season with minimal work. By combining a fresh water flush, having it filled with oil, giving it a full fuel treatment and a fogging, it will feel rejuvenated, and even its plugs will have had attention and rehabilitation.
Before we begin, please note that any time you do your own winterizing or other maintenance while still under warranty, it’s best to buy all your supplies from a Yamaha dealer like us and keep all your receipts in a file for proof you are following the manuals in case there are any non-maintenance issues in the future.
Here are easy to follow instructions to winterize your outboard:
- Start using something like Startron regularly about a month before winterization, or at least run it through on your last excursion.
- Top off your gas tank and add proper amount of stabilizer.
- Run on muffs, using Salt Away or similar product.
- Change the engine oil and filter by removing the 7/16th-inch crankcase bolt on the starboard side of the leg and letting the oil drain into a pan. Replace the oil and secure the crankcase bolt back into place.
- Start the engine/motor. Run it for about 15 minutes to increase the temperature to normal operating level. Spray fogging oil into the fogging inlets on each throat of the intake manifold (the little “male” stems sticking out of the plastic manifold with a small 1/4″ rubber cap over them) for about 5-10 seconds for each cylinder, then shut down the engine.
- Drain VST filter. You’ll see a small diameter drain line made of clear PVC tubing on the port side of the engine and a drain screw. Loosen the screw and let the gas drain out. Tighten the screw and snap the tubing back into place.
- Replace your remote spin-on gas filters.
- Drain and replace the lower unit oil. Make sure you replace the red O-Rings on the drain plugs as well.
- Spray engine block with Corrosion X or a similar product.
- Clean and wax the engine cowl and S/S props.
- Put engine in the full down position so that any water drains completely out of it. Also remove the flush hoses to insure that water is drained out of them as well.
Additionally, you should remove the propeller if you are working on your outboard when your boat is on its trailer or if the motor is being kept on a storage stand. Here are the steps to do that:
- Remove the cotter pin from the propeller nut.
- Using a wrench, remove the propeller nut and slide the thrust hob, propeller, and washers from the propeller shaft.
Failure to remove the propeller when working on the motor out of the water could result in serious injury. Please use caution when working on your boat any time of the year.
If you’ve followed these instructions, your Yamaha outboard should be winterized successfully for storage until boating season returns. Please, contact us immediately if you have any questions, need assistance, or anything else our professional staff can assist you with.
